Monday, June 25, 2012
Small update - No photos!
Just wanted to give a small update, since it's been a week since my last update. The dome is currently awaiting it's final pieces so that I can call it "finished!". Currently, on order we have....
1. JAG Aluminum skirt.
2. (3) Aluminum Holoprojectors.
3. Teeces V3 light kit. (this is the lights for the dome)
4. Diet Aluminum Surrounds (this holds the lights in the dome).
Once these pieces arrive, I will have some work to do (especially with the Teeces)but I will finally have everything to finish the dome, and glue it up and then we'll get to start collecting the final pieces to the body! Once the body is done, it's time to start on the legs.....and you guessed it, once those are done, it's just electronics and then we'll be "done"......although truthfully, these things are never done, because once he's up and running, i'll start thinking about acquiring fun items like the periscope and life form scanner.
That's all for now, we're just anxiously awaiting some parts to get here!
Tuesday, June 19, 2012
REAR PSI.
The rear PSI is one of the most difficult cuts on the dome. This is because the rear PSI is exposed, and all of the other holes, are covered by the outer dome, which is laser cut. Since everyone can see this hole, it's important that it looks good and is round, otherwise, everyone will know!
The rear PSI measures 51mm across. The general way of doing is, is to drill holes, and then carefully file until you get a nice round circle. However, after looking at all the other holes I did today, none of them were particularly "perfect".
So, I decided to improvise and try something else. I went and a used a hole saw that measured 44mm. I then created a "perfect circle" inside the outline of the circle that I had created from tracing the template. Since I had a perfect circle, filing was a lot easier since I already had the shape!
Here are the results...
 To show you how perfect this is, I held up my PSI housing behind it, and took some more photos.

 The housing is now ready to be installed! I have to enlarge the front PSI a little because the housing sticks through the inner dome and sits flush with the outer dome. The rear PSI sits FLUSH WITH THE INNER DOME. That's important to note.
Cutting more dome panels.
Over the last 6 hours, I have worked my butt off cutting out the remaining panels of the dome. Most, if not all, will have to be slightly enlarged when the parts arrive, but that's the easy part.
I started by cutting out the HPs. The holes are fairly straightforward to work with. Drill all around them, then I cut them into a "pizza shapes" and simply bent and twisted them out.


 Next, I started to cut out the rear logic. I took photos here to show my cut-out process. Here, you can see how I am drilling holes all along the outline.
 and after some more holes, you eventually get all the way around.
 Then, you want to take your dremel, and cut out all around the holes you drilled. The holes make it a LOT easier to cut out.
 And finally, you want to take your file, and smooth it all out....!
 Here is a picture of my front PSI.
 Here are a couple pictures of my front Logics.

 Next, I went and took a small break from cutting, and countersunk my screws into the nylon ring. The tutorial suggests 4 screws.....however, since I made a cut in the dome, I went and placed 6 screws into the Nylon Ring.
 Next, I am going to do the rear PSI.....but I am going to make another blog post for it.
Monday, June 18, 2012
Assembling PSI Housing.
Today, I did some drilling on the dome, but nothing really worth noting. I didn't start on the dome until about 9pm, and around 10pm, I decided that it was too late to make that much noise outside. So I moved inside and started assembling the PSI housing. The larger PSI assembled very easily, however, the small one was a little bugger! The lense did not want to fit in the frame, so I had to take a very small file, and start filing!! It took probably 30 minutes of filing before it would even get close, I then used a wooden popsicle stick and a hammer to 'force' it the rest of the way. Got them all installed and they're done!!
Hoping by the end of this week, I will have the dome all cut out, and have these things counter sunk in there. Here are a few photos of tonight's work.....!


Sunday, June 17, 2012
Installing the dome drive!
Today was a rather productive day. I started by drilling the inner dome to start getting it ready for all the accessories like the HPs, PSIs, and Logics. Tons of small holes are drilled around the outlines and will eventually be cut out with a dremel, a file, and a lot of love!
 Next, it was time to start mounting the dome drive. The drive I have was made by Daren, and is very nice. I started by counter-sinking some holes in my JAG frame.

 Next, I screwed the dome drive into the frame.
 In this shot, you can see how I secured the spring. I did a washer, then a nut, the spring, and then two more nuts.
 Next, I wanted to go ahead and install the nylon ring into the inner dome. To get the ring to fit, I had to make a small cut (about 1") into the inner dome so that it would slide over the ring.....
 Here, you can see how the dome fits on the angle ring after it's been installed.
 PROTIP: Do NOT place your nylon ring entirely on your rockler bearing until you are ready to MOUNT it. It is damn near impossible to remove once it's on there.
Here, you can see how the cut fits around the ring. My plan here, is to put one counter-sunk screw on each side of the cuts. Then, put one every 90 degrees going around the dome, essentially counter-sinking 5 screws into the dome.
PROTIP: Do NOT place your nylon ring entirely on your rockler bearing until you are ready to MOUNT it. It is damn near impossible to remove once it's on there.
Here, you can see how the cut fits around the ring. My plan here, is to put one counter-sunk screw on each side of the cuts. Then, put one every 90 degrees going around the dome, essentially counter-sinking 5 screws into the dome.
 Here, I got my rockler bearing installed so that the dome can be installed. However, I do not want to put it on there yet because I still need to drill out a lot of holes. However, I needed to place the nylon ring in there for support when cutting out pieces on the side.
 I was going to finish counter-sinking the holes in the dome, HOWEVER, I do not have a drill-bit small enough for these screws. So tomorrow, I need to go to Home Depot or Lowe's and pick up a small torx head bit. I also need to get some reinforced Dremel discs so that I can finish cutting the inner dome parts.
The JAG aluminum skirt should be here soon, and I am slowly working on acquiring three (3) aluminum HPs.
I was going to finish counter-sinking the holes in the dome, HOWEVER, I do not have a drill-bit small enough for these screws. So tomorrow, I need to go to Home Depot or Lowe's and pick up a small torx head bit. I also need to get some reinforced Dremel discs so that I can finish cutting the inner dome parts.
The JAG aluminum skirt should be here soon, and I am slowly working on acquiring three (3) aluminum HPs.
Saturday, June 16, 2012
Trimming the dome.
Today, I was able to get the inner dome trimmed. I started by putting a small gap ABOVE and BELOW the gap (about a quarter's width). Then, I drew a line all around the dome where I wanted to make my cut. I next took my dremel, and scored the entire dome along the line. I made a cut that went all the way through my dome, then took my hacksaw and WD-40 and went to work. About a hour and a half later, I made it about 4-5 inches around the dome......not very good progress!!
Luckily, Cobalt60 from the forums recommended using some tin snips to cut the dome. I paid $9.00 for a set of aircraft grade snips at Lowe's......and I had the whole dome done in 10 minutes. Here are some photos showing this progress.
Here, you can see the inner dome sitting on my pool table. It's extremely flat, which is something I am proud of!
 Next, I added the blue ring, and placed the outer dome on it as well. You can see the small gap, but when the blue ring is raised a little, you'll be able to fit a quarter above and below the blue gap.
 Here is another shot of the same thing, just with more blue panels!
 On today's list, I plan to countersink some holes in the inner dome, and hopefully get it mounted to the rockler. We shall see.
Monday, June 11, 2012
Also.....
Also, I want to add that in the next few weeks, the JAG Aluminum Skirt should be arriving, which will make for a FUN day!! I also decided to go ahead and get the aluminum center vents, so they will be arriving soon as well. Now I need to pick up a set of Skin Snaps and R2 will really start coming together.
I'm BACK in the saddle again!
While I have been gone from the R2 building community for awhile, my efforts are finally back on the right track. A LOT has happened in the last few months that'd make about any man say the hell with it, but I still give it my all, and know that soon things will be back to normal. Anyway, in an attempt to clear my head recently, I said why not do something that makes you enjoy yourself some....and then I saw poor untouched R2 sitting in the corner, and decided he needed to get back into the spotlight. So to start with, I dismembered all the skins, and primed them with self etching primer!
 Then of course, came the Rustoleum Satin White......I wasn't sure how much to use to attain full coverage, and in the end, used damn near 2-cans worth!
 After that was done, I decided to start painting some of the dome panels. I still need quite a bit to finish the dome, including the Teece's kit, the Holoprojectors, logics, and maybe something else, but either way, the blue can start going on.....I used Sonic Blue Pearl, straight from the can.
 Once the blue had dried, and was clear coated, I had to test it on the dome to see what it looked like. This was really the first time R2 got some color to him and started to look like.....well, R2!
 Next, it was time to enjoy the fruits of my labor, painting these skins and panels took place over about 4 days, and well, it's time to see if R2 looks like himself. So I started by laying all the parts out.

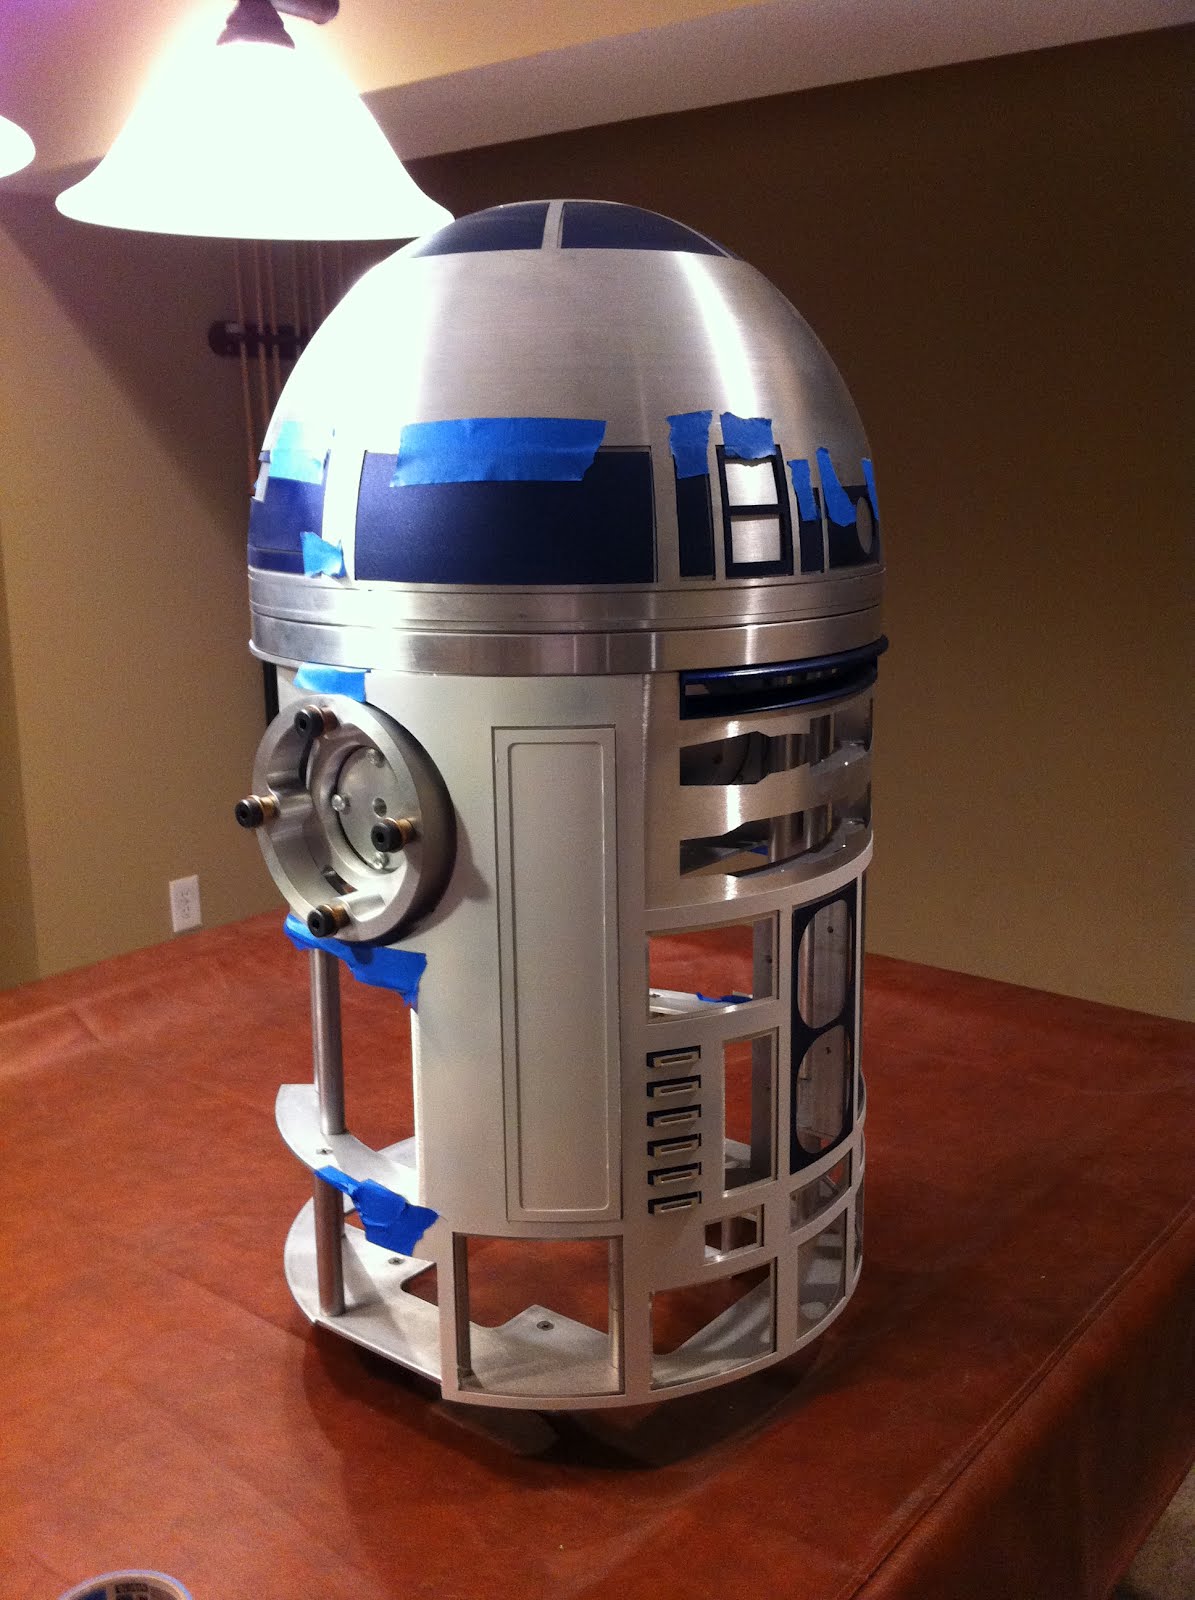
 And then, using Scotch Blue Tape, I taped some pieces together, and taped them to my frame to get a good look!

 And finally, I had to place one of the doors on him so I could see how he'd look with the panels, and this is my favorite shot of R2 so far......you can really tell he is starting to take on a new life!

 Then of course, came the Rustoleum Satin White......I wasn't sure how much to use to attain full coverage, and in the end, used damn near 2-cans worth!
 After that was done, I decided to start painting some of the dome panels. I still need quite a bit to finish the dome, including the Teece's kit, the Holoprojectors, logics, and maybe something else, but either way, the blue can start going on.....I used Sonic Blue Pearl, straight from the can.
 Once the blue had dried, and was clear coated, I had to test it on the dome to see what it looked like. This was really the first time R2 got some color to him and started to look like.....well, R2!
 Next, it was time to enjoy the fruits of my labor, painting these skins and panels took place over about 4 days, and well, it's time to see if R2 looks like himself. So I started by laying all the parts out.

 And then, using Scotch Blue Tape, I taped some pieces together, and taped them to my frame to get a good look!

 And finally, I had to place one of the doors on him so I could see how he'd look with the panels, and this is my favorite shot of R2 so far......you can really tell he is starting to take on a new life!
Subscribe to:
Posts (Atom)