Monday, October 22, 2012
Update on skins!
As an update, I have been doing some research and it doesn't look like attaching the outers will cause any sort of problems. It seems as though most pieces can attach to the skins OR to the frame, so, I think the disaster is averted!
Sunday, October 21, 2012


Skintimate!
Well. So far, throughout this build, I have done a pretty good job of thinking ahead to prevent mistakes. However, I think I may have made one here, but I am certain there will be a way to fix it in the future.
I went ahead and bonded the outer skins to the inner. Why I did this, I am not sure because it will eventually screw me over. I knew that parts had to be counter-sunk into the inner skins, but for some reason, it honestly never crossed my mind. With that said, I am sure I can find other ways to attach the few pieces left for the body.
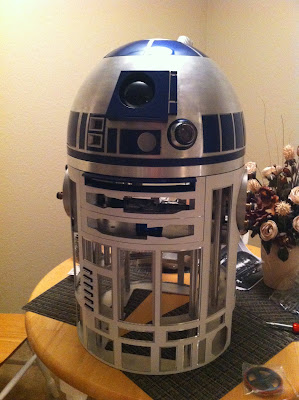
With all of that said, I am VERY happy with how things have turned out, and R2 is starting to look more like....well, R2 all the time! The outer skins are bonded with a combination of VHB tape and silicon. Don't ask why, it's proprietary!!
Here are a few pictures of R2's current state! As with the dome, all doors are secured with silicon so that they can easily be removed in the future when I decide to hinge them!


Saturday, October 6, 2012
Attaching the Skins!
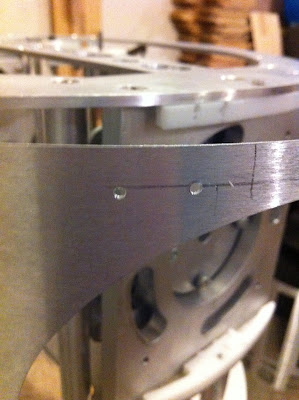
After having these aluminum skins for a LONG time, and now having a newly renovated frame, it's time to really make R2 come alive and add his skins! For starters, I am using Daren Murrer's "Skin Snaps." The premise behind them is that one piece attaches to the skins, and the other is firmly attached to the frame, then the two pieces attach to one another and become one.
Daren provides a tutorial to mount these, and as helpful as it is, I decided to do some of my own modifications and make this a little easier of a process. I will not go into details of everything, but you can look at the photos and see the modifications I made, and as always, you're welcome to ask questions!
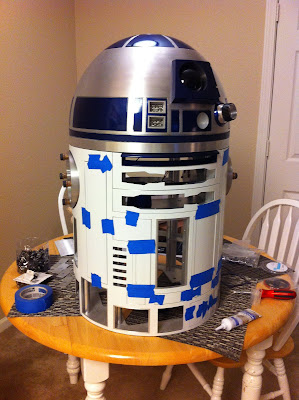
Here are some photos of the current progress. The rear skins have not been installed yet, just the front inner skin. Tomorrow, I hope to get the rear inner's attached, as well as getting both outer's VHB taped on.


www.commando8.com
It's been awhile for any updates, but for those of you not involved with Astromech, let me give you a nice update. Turns out, my frame rings on my JAG frame were 1/16" too big for the skins to fit properly all the way around. I was left with the choice of leaving the gap, splicing in some styrene, or finding a local shop to shave 1/16" off the rings. Every shop around here quoted me an astronomical amount to do this, which left me little options. Until.......
James stepped in. The title of this post is www.commando8.com and that's largely due to the fact that James stepped in and offered to to fix my frame for FREE! A frame he didn't even produce. James, otherwise known as Com8, is the current producer of fine aluminum frames for your R2 build. He offer's 3 versions of the frames, even one for the budget minded individual! James went ABOVE AND BEYOND the call of duty and accepted my frame as his own, and provided me with a frame that was now absolutely perfect, and truly, one of a kind. If you're wanting to start your own R2, I highly suggest considering one of his frames. The customer service he provides is truly amazing. Here are some photos of my new and improved frame!
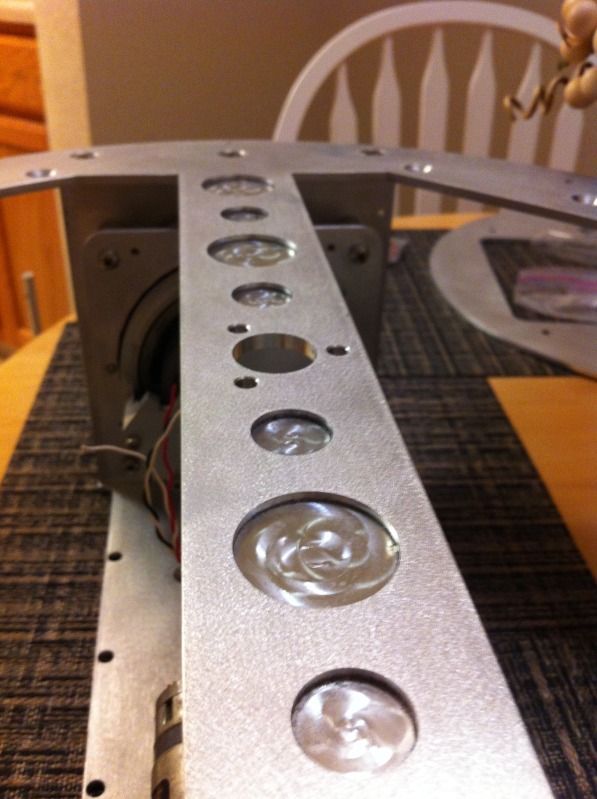
Check out the lightened holes on the top of the frame!
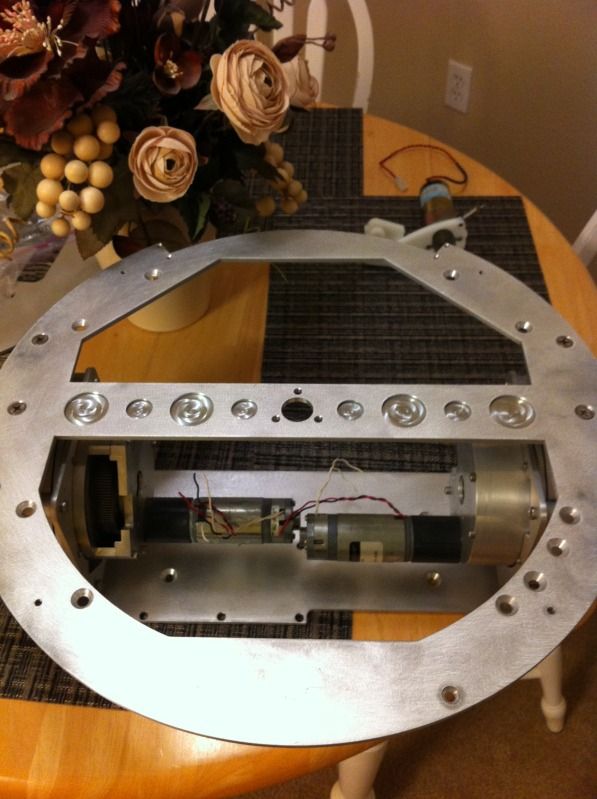 Here is another photo of the top looking across the brace! See that hole in the middle? Yeah, James added a hole for a slip ring!
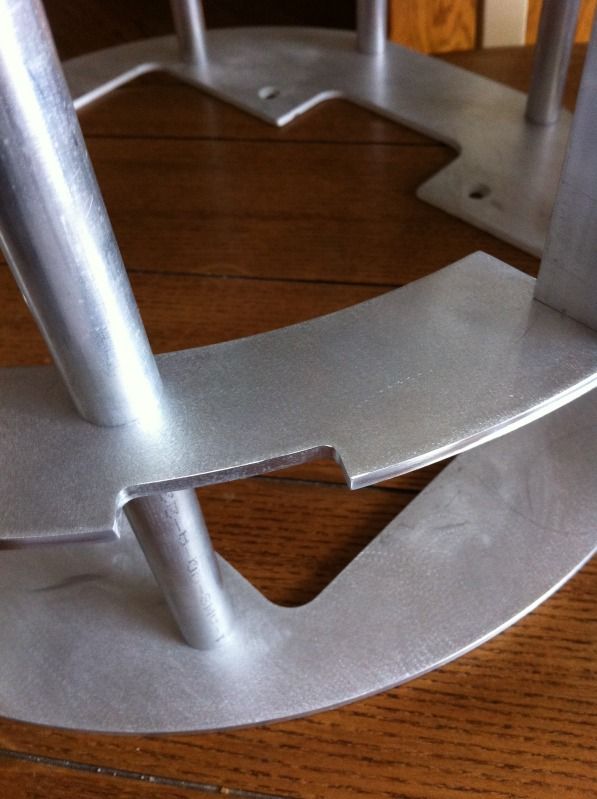
 Here is a photo of the frame assembled and the coin slot cut-out that James added!
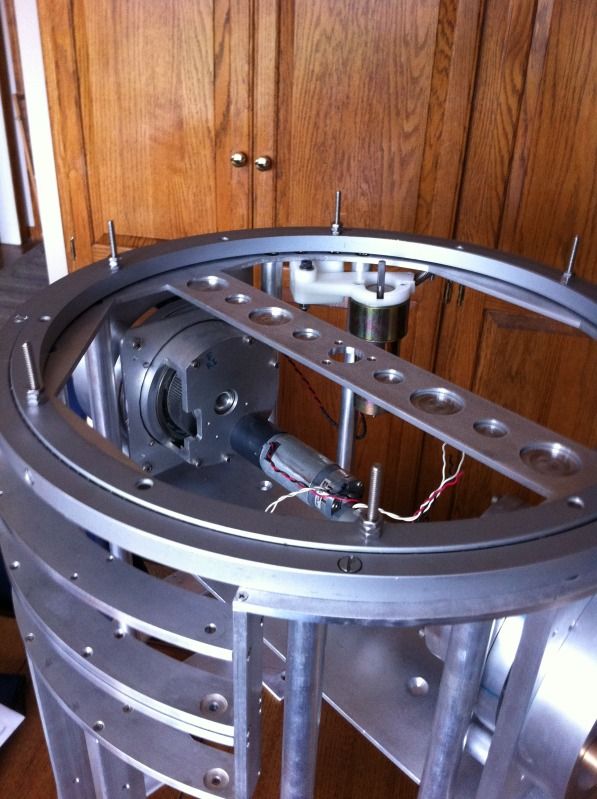
 Finally, here is just another shot of it all put together. It's truly unique and amazing. The frame is just drop-dead gorgeous.
 Here is another photo of the top looking across the brace! See that hole in the middle? Yeah, James added a hole for a slip ring!
 Here is a photo of the frame assembled and the coin slot cut-out that James added!
 Finally, here is just another shot of it all put together. It's truly unique and amazing. The frame is just drop-dead gorgeous.

Subscribe to:
Posts (Atom)