
Friday, December 30, 2011
NEW PART DAY!
Also forgot to mention earlier that the mailman dropped off a new part! A restraining bolt to keep R2 in check! Here's a picture! All aluminum and only $12!

12/30
Almost end of the year, and today I managed to get my skirt fully sanded, and primed. Added the final coat of primer to the center leg as well. Tomorrow, here in Kansas City, we're expecting a high of 61 degrees.......sounds like a good day to try to get some white on and see what happens. I've engineered a rig to help me paint both sides at once, so we'll see how it goes. Didn't take any photos tonight as there wasn't "too" much interesting stuff, however, I will take photos when the white goes on!
Thursday, December 29, 2011
more work!
Got a little more work done this afternoon. Nothing dome-related though. I got the skirt 3/4 the way sanded, and then on the last side, I added a little more filler and will let it dry over-night to allow it to properly harden. I also applied another coat of primer to the legs, and then I ran out half way through, so I went up to the hardware store for another can.....! When I got home, I finished spraying the legs, and then took my dome and took these few crappy pics!


As of right now, I am still on pace to get some white done this weekend.....that'll be a good moment. Also, from looking at the pics....you can tell I really need skins!


As of right now, I am still on pace to get some white done this weekend.....that'll be a good moment. Also, from looking at the pics....you can tell I really need skins!
Wednesday, December 28, 2011
dome MADNESS!
Well......truth be told, it's cold......so not much is getting done until this weekend, but tonight, while sitting around the house, I removed all of the small 'waste' around the panels of the dome. This dome has a really tight fit around the inside dome, so I may not need to do much sanding to get it ready to go ( I think Daren knows I hate sanding)....anyway, here a few pictures of the small progress.


Hope/plans for this weekend include possibly removing dome panels, sanding/refilling of the skirt, priming of the skirt, and depending on the weather, maybe a first coat of white on the legs/skirt........aim high right?


Hope/plans for this weekend include possibly removing dome panels, sanding/refilling of the skirt, priming of the skirt, and depending on the weather, maybe a first coat of white on the legs/skirt........aim high right?
The DOME Arrives!!!
December 28th, 2011........what a day!!!
I came home to a big box on my doorstep! I knew what it was by the sender, but it didn't stop me from taking a series of photos!!
Here's the box as it sits...

I cut open the edges with a pocket knife.....

I open it up to find........another box?!

Open the other box and reveal this round thing!!!

Now you can start to see the top of something....aluminum, and ROUND?

removing some of the packaging, you can see the 300mm dome!!

Here you can see all the pieces laid out side by side!!!!!!!!

Here is a shot showing how close the two domes are in size!

December 28th!!! A day that is now a new holiday for me!!!
Monday, December 26, 2011
coin slots painted!
Tonight I got the coin slots painted and clear coated. It took some doing finding cans of Sonic Blue Pearl, but I managed after going to 3 different stores!!
So here's a look of the unpainted slots, and the two cans of paint I bought.

Finally, I went and sprayed lighter coats of the blue on. I waited about 10 minutes, and would spray another coat on, and then did this three times. After the 3 coats, I then waited 30 minutes, and did a coat of clear. I waited 2 minutes for each coat of clear and placed two coats of clear on here and allowed to dry. I gave it 4 hours of dry time before taking these photos! I must say, I am very happy with the results.

Now, it's time to remove the masking tape that protects the ends of the slots. If this tape failed me, then it would pretty much ruin my coin slots.

so far so good.........

and finally, all of the masking tape removed!!!!!

Very happy with how this came out. Took a lot of time masking and prepping, but I think the end result in worth it. The only downside is I still think that this is a darker blue than I would like, however, I am keeping it for now, and will see what it looks like in a more natural light!
Sunday, December 25, 2011
MERRY CHRISTMAS!!!
MERRY CHRISTMAS EVERYONE!!
December marks the 6th month anniversary since the beginning of my R2 build. Today, After spending time with the family, and things calmed down, I decided to be productive!! With the news that both my skins and dome have shipped, I decided it was time to get a move on and really accomplish something.
To start with, I needed to cut the grooves in my legs. This was actually fairly simple, I added a 1/4" and a 1/2" to each side to make it 'level' and then proceeded to cut the long edges on the table saw, and used a hand saw for the short edges.

Next up, I needed to start (and finish) filling the center leg. This step went very fast because my center leg was pretty damn smooth with no filler on it. However, just to smooth it all over, I went ahead and filled 90% of the thing. (90% because the upper portion will never be seen.)

Next up, we have a group shot of all the products I will be using. I didn't get to use any of the satin white today, but everything else was used!

Next up, here is a shot with a light coat of primer on the main legs. During this time, the filler was drying on the center leg.

Next, we have my first ever attempt with etching primer. After racking my brain over it, I decided to go ahead and paint my gorgeous aluminum coin slots. I will probably regret it in the future, but.....eh! So, with my first attempt, I decided I should do it with something like these, rather than the skins the first time.
What I did, was mask over the edges of the coin slots (you can barely tell), and then proceed to spray the etching primer over the whole thing. I waited about 5 minutes, and did another coat. I then waited about an hour, and sprayed my normal primer over the whole thing. I plan to use duplicolor Sonic Blue Pearl from a can to pain these beauties, and with some luck, my masking job was good enough that it will look good when it's done. Here is a shot of them in their current state.

Next, I put some clear coat over my resin pieces. They're not the 'cleanest' out there, but when the weathering is applied, they'll look good as new! or used....or?

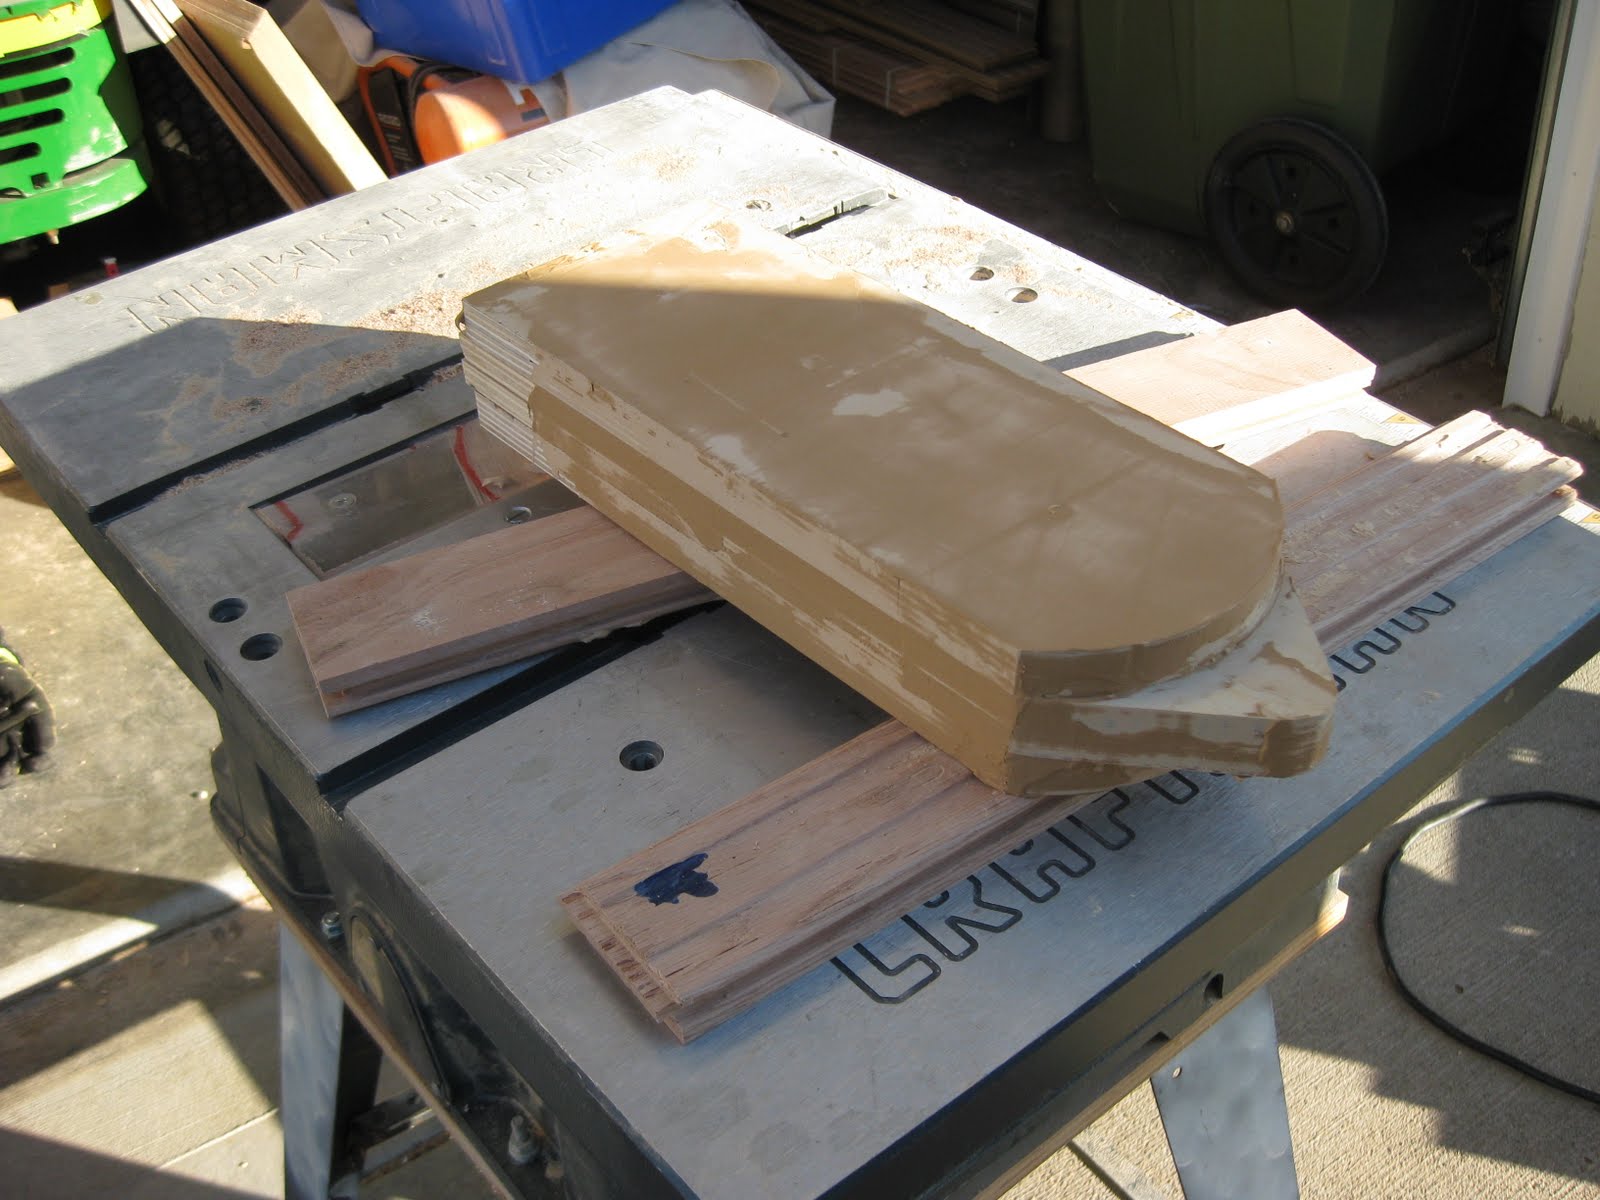
Now, the moment that has perplexed me for quite some time, cutting the hole out of the skirt. For this, I drilled a 1" hole right along the edge on each short side. I then proceeded to insert a sawzall (spelling??) and go along the edges. Unfortunately, I drilled my hole a little too wide, so I had to use a LOT of filler in there to fix that, but overall, it's pretty good.


Next up, the center leg was dry from the filler, so I used a mouse sander and quickly sanded it smooth, and slapped some primer on it.

Finally, I took a shot of a close up of my grooves.

Currently, they're outside drying, and in about an hour, I will take them in for the night and see what they look like. Tomorrow I intend to do another 1-2 coats of primer, and try to get some white on there! Hope everyone had a Merry Christmas!!
December marks the 6th month anniversary since the beginning of my R2 build. Today, After spending time with the family, and things calmed down, I decided to be productive!! With the news that both my skins and dome have shipped, I decided it was time to get a move on and really accomplish something.
To start with, I needed to cut the grooves in my legs. This was actually fairly simple, I added a 1/4" and a 1/2" to each side to make it 'level' and then proceeded to cut the long edges on the table saw, and used a hand saw for the short edges.

Next up, I needed to start (and finish) filling the center leg. This step went very fast because my center leg was pretty damn smooth with no filler on it. However, just to smooth it all over, I went ahead and filled 90% of the thing. (90% because the upper portion will never be seen.)
Next up, we have a group shot of all the products I will be using. I didn't get to use any of the satin white today, but everything else was used!

Next up, here is a shot with a light coat of primer on the main legs. During this time, the filler was drying on the center leg.

Next, we have my first ever attempt with etching primer. After racking my brain over it, I decided to go ahead and paint my gorgeous aluminum coin slots. I will probably regret it in the future, but.....eh! So, with my first attempt, I decided I should do it with something like these, rather than the skins the first time.
What I did, was mask over the edges of the coin slots (you can barely tell), and then proceed to spray the etching primer over the whole thing. I waited about 5 minutes, and did another coat. I then waited about an hour, and sprayed my normal primer over the whole thing. I plan to use duplicolor Sonic Blue Pearl from a can to pain these beauties, and with some luck, my masking job was good enough that it will look good when it's done. Here is a shot of them in their current state.

Next, I put some clear coat over my resin pieces. They're not the 'cleanest' out there, but when the weathering is applied, they'll look good as new! or used....or?

Now, the moment that has perplexed me for quite some time, cutting the hole out of the skirt. For this, I drilled a 1" hole right along the edge on each short side. I then proceeded to insert a sawzall (spelling??) and go along the edges. Unfortunately, I drilled my hole a little too wide, so I had to use a LOT of filler in there to fix that, but overall, it's pretty good.


Next up, the center leg was dry from the filler, so I used a mouse sander and quickly sanded it smooth, and slapped some primer on it.

Finally, I took a shot of a close up of my grooves.

Currently, they're outside drying, and in about an hour, I will take them in for the night and see what they look like. Tomorrow I intend to do another 1-2 coats of primer, and try to get some white on there! Hope everyone had a Merry Christmas!!
Friday, December 23, 2011
NEW PARTS DAY!! - Couplers and Hubs.
Today I received some new parts in!! They had already been painted which makes my job much easier. They had been painted red by the previous owner, so all I had to do was switch the red......to blue!

Before I could start painting, I had to pick up some vitals. Sonic Blue, Crystal Clear, Paint Brushes, and 1500 grit sandpaper were all on the list!

Here you can start to see the transformation. There is still some red, but most is now blue!! It looks black, but it's definitely a nice shade of R2 blue. Once it dried, it lightens up nicely as well!

With the flash on, you can see more of the 'blue'

Here, with the flash off, you can see how much darker it looks!

Finally, you can see how I masked the edges of the couplers so I could paint the sides......For the curved part of those raised edges, I had to free hand them, and then clean-up.......took some time, but they look good.

For now, they're drying overnight before they'll receive a 1500gt sanding tomorrow, and then, I will give them a light clear coat!!!!!
With some luck, I will see my aluminum skins tomorrow as well!
Tuesday, December 13, 2011
EVO GAS PIPE METHOD.
Here is the video you have all been waiting for. This is my video presentation of the 'EVO' gas pipe method. Please watch and let me know what you think!!!! Also please bear in mind that you may need to cut the pipe to your desired width.


So smooth.
The legs are damn near done. Two coats was about all that is needed with the wood filler to make them perfect. There are a few "iffy" spots that I may go over very lightly and redo, but I am 98% happy with them! It took about 25 minutes of sanding tonight to get them this way, and as a result, I figured I would share a lot of photos!!


Monday, December 12, 2011
More leg work.
Okay, productive Sunday to say the least. I started by opening up the arm pits on the legs.....so maybe they're actually leg pits?! Anyway, this was fairly tedious and really should have been done before the glue up...lesson learned, however, it's done now!

Next, I started sanding my initial coat of wood filler. This went fairly quickly and easily and sanded fairly smooth (as you'll see in the last pic). I want to add about 2 more coats over all the edges just to ensure an extremely smooth finish. I may use an Evercoat glazing putty over the thing once I am happy with it just as a harder finish. I also took this time to test my plywood discs to ensure that everything was lined up! Thankfully, it's all lined up and perfect!

Here is that shot of the smoothness along the edges. You can see some tiny bumps in there that will eventually get sanded out, however I am very happy with the initial results.

Saturday, December 10, 2011
Legs are closer!!
Been a little behind on my photos. Largely due that the camera battery died and I was too lazy to plug it in. Fear not, as I have fixed the problem!
For starters, today I finished my droid discs as I call them....these are basically the little discs that attach the gas pipes to the legs.

You may notice a few things here, first, my circles aren't that round! 2nd, yes I know there is a T-nut in there upside down. 3rd....you may notice on my discs what I am now calling "weight holes".....what this actually is, is when I first drilled my discs, I didn't check the hole in the leg to see how wide it was, and in turn, when I drilled the first set of holes, they were actually placed OVER the hole, so now screws could have been screwed in the holes. Problem solved however. In that photo, you can also see my electrical plates that are drilled. One change I am going to make, however, is that instead of using 2" screws all around, I have switched to 1" screws for the center, and 1.5" screws for the 6 outer screws.
Next, I took the legs out to the garage and started filling them. I can't fill the whole leg yet as I haven't opened up the shoulder pits....this step SHOULD have been done before the glue up, however, I don't follow directions well, so I make it harder on myself.


Next up, I am going to shoot a video showing you my new amazing gas pipe. Being a scientist, I have dubbed this method the "EVO gas pipe". This little beauty will set you back less than $20 and you'll never have to find a pipe that sticks inside another pipe again!!
Subscribe to:
Posts (Atom)